Backing up your files is one of the most important things you can do to safeguard the data you create and store on your computer. To this end, Microsoft included a full backup and restore utility with Windows 7. Here’s how it works.
Backing Up
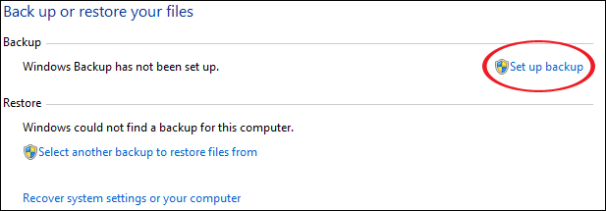
First you need to launch Windows' Backup and Restore utility. You will find it in the Control Panel by selecting first System and Security and then Backup and Restore. If you have never used this tool before, you'll see a message under 'Backup' that says 'Windows Backup has not been set up'. Click the link labeled Set up backup to the right of that message.
After the program starts, it will prompt you to choose a location for it to store your backup files in. Windows won't let you choose your main hard drive as a backup drive; so if you haven’t already plugged in your external hard drive, do it now and click Refresh.

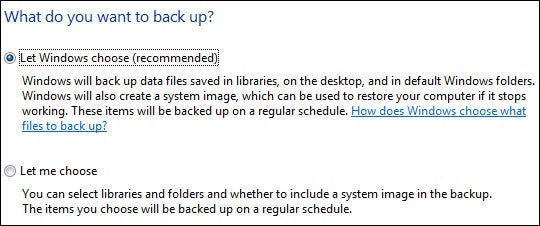
After you've chosen the drive that you want to use for your backup, the program will ask you to identify what you want to back up. The default selection is to let Windows choose for you, and create a disk image at the same time. You can be much more selective, however, by clicking the radio button next to Let me choose.
Once you've chosen what you want to back up, and where you want Windows to store it, the program will display a backup summary screen that confirms the options you selected. Before you run your backup, though, you'll probably want to take a look at the default schedule that Windows has set up for you, to confirm that your computer is going to be on at that time of day. If you want to adjust it, click Change schedule and then set it to something more suitable to your schedule.

Finally, click Save settings and run backup. The first backup will be a somewhat lengthy process, but future backups will be quicker, as they will back up only files that have been added or changed since your previous backup.
Restoring From Backup
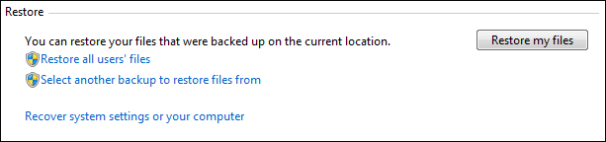
Restoring files from your backup is fairly simple. First, launch the Backup and Restore utility, (as described above); then decide whether to restore all of your files, or just specific files that may have been deleted or become corrupt.
To restore all of your backed-up data, click Restore my files, followed by Browse for folders. Next, on the left side, look for the folder bearing the name of your backup. Click that folder, and then click Add folder. Once you've added the folder to your restore list, click Next and choose whether you want the files restored to the original location or to a new location. Finally, click Restore to bring back all of your data.
By Jonathan Wylie, PCWorld
To restore specific files, first click Restore my files, and then click Browse for files. Navigate to your backup folder, and choose the individual files that you want. Again, the program will ask you whether you want to restore the files to their original location or to a new location. Once you decide where you want them, click Restore to recover the data you selected.
Unsure about the name of the file you want? Click Restore my files, and then use the Search button to examine your backup for the keywords that you type into the search field. In the search results, locate the files you need, add them to the restore list, and restore them as described above.
No comments:
Post a Comment